
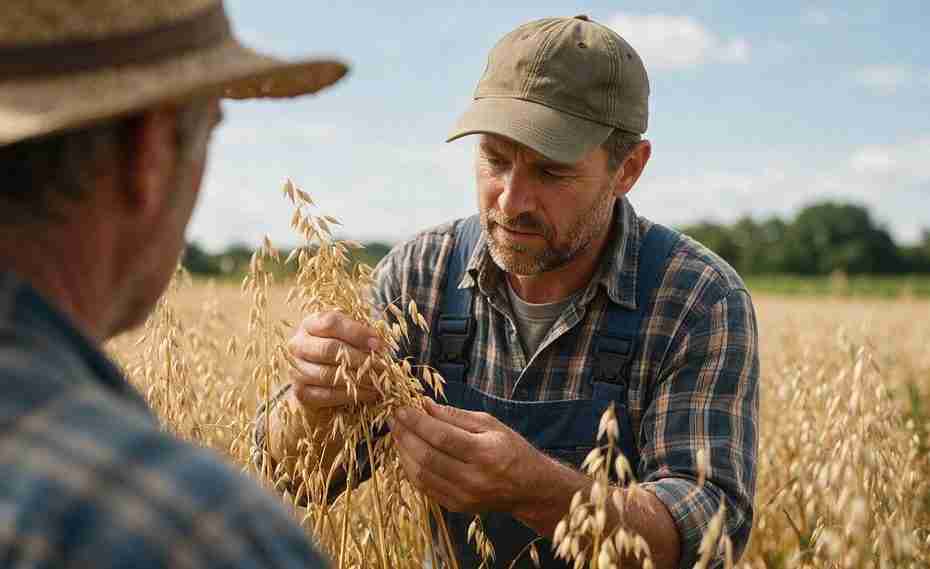
Harvesting oats for food works best when you match crop maturity to grain moisture: swath near 30 to 35 percent moisture, or direct combine near 12 to 14 percent moisture. Your goal is cream to tan kernels at the hard dough stage, followed by gentle threshing, prompt drying, and clean storage.
Food-grade oats have a narrow harvest window. Cutting too early can leave green, light kernels with excess hull, but waiting too long exposes the crop to shattering, lodging, sprouting, staining, and mold. This guide explains how you can choose the harvest date, compare swathing with direct combining, adjust the combine, and protect milling quality from the field to the bin.
Why Do Timing And Moisture Decide Oat Quality?
Timing and moisture determine whether kernels finish filling before harvest and whether your equipment can separate them without excess damage. When harvesting oats for food, you need mature, plump grain that can tolerate threshing and remain stable during storage.
Cutting before physiological maturity interrupts grain filling. The resulting kernels may be thin, green, low in test weight, or high in hull percentage. These defects reduce the usable groat, which is the edible kernel remaining after the hull is removed.
Leaving mature oats standing for too long creates a different set of losses. Ripe panicles can shatter, lodged plants may become difficult to collect, and wet weather can cause staining or sprouting. Repeated wetting also increases the chance of mold, so a forecasted dry-down period should influence your harvest decision.
How Can You Tell When Oats Are Ready To Harvest?
Oats are ready for harvest planning when the kernels have reached the hard dough stage and changed from green to cream or tan. The glumes should feel dry and papery, but some stems may remain green when the grain itself is mature.
Check panicles from several areas rather than judging the crop from the field edge. Remove kernels from the upper, middle, and lower portions because oat panicles don’t mature at the same time. Upper kernels commonly mature before lower kernels, so your decision should reflect the whole panicle and the variation across the field.
A hard dough kernel resists pressure and no longer releases milky material when squeezed. You may still be able to dent it with a thumbnail, but it should feel firm rather than soft or watery. Pair this physical check with a calibrated moisture meter because appearance alone can’t give you an accurate moisture reading.
What Moisture Content Should Oats Have At Harvest?
For swathing, target roughly 30 to 35 percent kernel moisture. For direct combining, wait until the grain reaches about 12 to 14 percent moisture unless you have suitable drying capacity and a plan to dry it immediately.
The 30 to 35 percent range gives swathed oats time to finish drying in the windrow without cutting the crop far ahead of maturity. At that point, the panicle is generally yellow or brown and the least mature kernels have changed from green to cream. Swathing much earlier can reduce yield and test weight because grain filling may not be finished.
Direct combining requires drier grain because standing plants go straight through the combine and into handling equipment. Grain near 12 to 14 percent is easier to store, but you should still test samples from several parts of the field. Low areas, lodged patches, late tillers, and field edges can contain wetter grain or green plant material that raises the average moisture in the load.
Should You Swath Or Direct Combine Food Oats?
Swath oats when maturity is uneven, the growing season is short, or shattering risk is rising before the crop can dry uniformly. Direct combine when the field is even, the stand remains upright, and dry weather will let the grain reach combining moisture.
Swathing places the crop in a windrow so the kernels and plant material can dry together. It can make harvest more uniform and limit losses from leaving fully mature panicles standing. The tradeoff is weather exposure because rain on a windrow can cause sprouting, staining, mold, or slower drying.
Direct combining removes the swathing pass and avoids leaving grain in a windrow. It works best in a uniform field with limited green material and enough standing strength to remain harvestable. You’ll need to monitor shattering, lodging, grain moisture, and the weather forecast because mature standing oats can lose quality quickly during wet conditions.
Your equipment also affects the choice. A pickup header can collect a well-formed windrow with limited loss, but a poorly shaped windrow may dry unevenly or become difficult to lift. A straight-cut header can work well in standing oats, provided you manage reel speed and cutting height to reduce panicle loss.
How Should You Set A Combine For Food-Grade Oats?
Use a lower cylinder or rotor speed and a wider concave clearance than you would normally use for wheat. The aim is to release kernels from the panicle without cracking the groats or stripping off too many hulls.
Start with the machine manufacturer’s oat settings, harvest a short distance, and inspect the sample. If you find dehulled or cracked kernels, reduce the cylinder or rotor speed before making large concave changes. If unthreshed panicles remain, tighten the concave in small steps or increase speed cautiously.
Set airflow high enough to remove chaff and light material, but check behind the combine before increasing fan speed. Oat groats and plump kernels can leave with the chaff when airflow is excessive. Use a catch pan or inspect several spots behind the machine so you can separate header loss from threshing and cleaning loss.
Review the grain tank sample whenever field conditions change. Morning dew, drier afternoon straw, lodged areas, and green patches can require different settings. A clean sample with intact hulls, little foreign material, and few damaged kernels is more useful than relying on one fixed setting all day.
How Do You Dry And Store Oats Safely?
Dry oats to about 14 percent moisture before routine storage and near 12 percent for long-term storage. Many food buyers may require 12 percent or lower, so check the contract before harvest rather than relying on a general storage target.
Natural-air or low-temperature drying helps protect germination, kernel color, and milling quality. Move harvested grain into the drying system promptly when it contains excess moisture, green kernels, weeds, or damp plant material. High heat can reduce quality, so follow dryer guidance for oats and any limits set by your buyer.
Remove fines and foreign material when practical because they restrict airflow and create areas where moisture can collect. Level the grain surface so air moves through the bin evenly rather than following a short path through one area. Aeration can cool the grain and help maintain a steady storage temperature after drying.
Check stored oats soon after filling the bin and continue inspections during storage. Watch for condensation, crusting, musty odors, insects, or rising grain temperature. A bin that contains uneven moisture can develop local hot spots even when the average moisture reading appears acceptable.
Which Harvest Problems Lower Food-Grade Quality?
Green kernels, low test weight, dehulled grain, weather staining, sprout damage, foreign material, and mold can all lower the value of food oats. You protect quality by identifying the cause of each defect rather than correcting every problem with the same machine adjustment.
Green or thin kernels often point to early harvest, uneven maturity, frost injury, or late tillers. Dehulled and cracked kernels usually indicate excessive threshing force or rough handling. Chaff and light material in the tank call for cleaning adjustments, but excessive fan speed can send good grain out of the combine.
Rain near maturity can reduce color and increase sprouting risk, especially when ripe oats remain in a windrow. Lodging slows harvest and can leave panicles close to damp soil, where collection losses and staining rise. If a field has experienced prolonged wet conditions, discuss sampling and testing requirements with your food buyer before placing the grain into a main storage bin.
Test weight is one widely used indicator of kernel plumpness and grain condition. The United States Department of Agriculture (USDA) minimum test weights are 36 pounds per bushel for United States No. 1 oats, 33 for No. 2, 30 for No. 3, and 27 for No. 4. A food buyer can set tighter limits and may also evaluate groat percentage, kernel color, moisture, foreign material, damaged kernels, and odor.
United States Oat Grade Test Weights
|
Grade |
Minimum Test Weight
|
|
United States No. 1 |
36 pounds per bushel |
|
United States No. 2 |
33 pounds per bushel |
|
United States No. 3 |
30 pounds per bushel |
|
United States No. 4 |
27 pounds per bushel |
When Should Oats Be Harvested For Food?
- Direct combine at 12 to 14 percent grain moisture.
- Swath at 30 to 35 percent moisture.
- Harvest when kernels are cream or tan and at hard dough.
Protect Quality From The Panicle To The Bin
Successful harvesting oats for food depends on coordinating maturity, moisture, weather, machine settings, and storage rather than using the calendar alone. Check kernels across the field, confirm their moisture, and choose swathing or direct combining according to crop uniformity and weather risk. Inspect the combine sample often, dry the grain promptly, and monitor the bin after filling. These decisions help you preserve test weight, groat recovery, color, and sound kernels while reducing the defects that move food-grade oats into a lower-value market.
References
- North Dakota State University Extension: Oat Production in North Dakota
- University of Minnesota Extension: Small Grains Resources
- Iowa State University Extension and Outreach: Integrated Crop Management
- Penn State Extension: Oat Production
- United States Department of Agriculture Agricultural Marketing Service: Grain Standards
- United States Department of Agriculture: United States Standards for Oats
- Prairie Oat Growers Association.